
Note: This is me walking through my learning experience from a joint effort with Jared Hocutt.
Right around the time Red Hat was acquiring them, CoreOS announced the release of a new framework and development kit around a concept called “Operators”. Since then, Operators have evolved into one of the best ways to effectively manage a kubernetes cluster as well as the applications deployed within it. But defining what an operator is and how they improve your cluster can be a little hard to put your finger on. They do a great job of abstracting out the kubernetes objects they use to get their job done. But the connections and interactions between those objects can be a little hard to understand. This post (it may become more than one), will take multiple examples I’ve used on the internet and glue them together to help make this fundamental knowledge a little more clear.
The Operator Logo - Harry Potter vs. Shazam?
The problem we’re going to solve for is a totally selfish one. We’re going to write a kubernetes Operator that will deploy customized customer workshops so I can spend less time deploying them as well as fixing them when a workshop attendee borks up their environment. Before we get into a solution, let’s quickly scope out the problem.
I want to build an Operator that will:
Create a Workshop resource inside kubernetes that will deploy and maintain all of the shared resources for a workshop. These could include things like container registries, shared lab content, etc. These shared resources need to be able to be specified for each unique deployed workshop.
The workshop object needs to accept a number of students, and use that number to deploy Student resources that create customized content for each student in the workshop. The student’s content could be applications to work with, lab guides, databases, etc.
so that workshops will be easier to deploy, more dynamic, self-healing, and a better experience for the attendees.
This isn’t a real user story. I know. But you get the gist, right?
Like many new technologies, the kubernetes components that make up an Operator aren’t new. But the way they’re built, managed, and implemented is revolutionary. At its most fundamental, an Operator is a kubernetes Custom Resource Definition (CRD) and a custom Controller.
Controllers are essentially the brains that integrate a CRD into the kubernetes API and database. They control the interactions between users and custom resources. For time’s sake, we’re not going to go deeper than that. If you’re interested, a great primer on Controllers by Thomas Stringer is right here on Medium. Extending Kubernetes: Create Controllers for Core and Custom Resources *Kubernetes is powerful and ships with a lot of out-of-the-box functionality. But as we start to think of new ways to…*medium.com
One of the best things about Operators is they can abstract away most of the need to manage that on your own.
CRDs are the actual resources that do the heavy lifting for your custom work. We’ll get into an example of the CRDs we’ll need to create further down the page. If you want to go super deep into CRDs, they’re well covered in the docs.
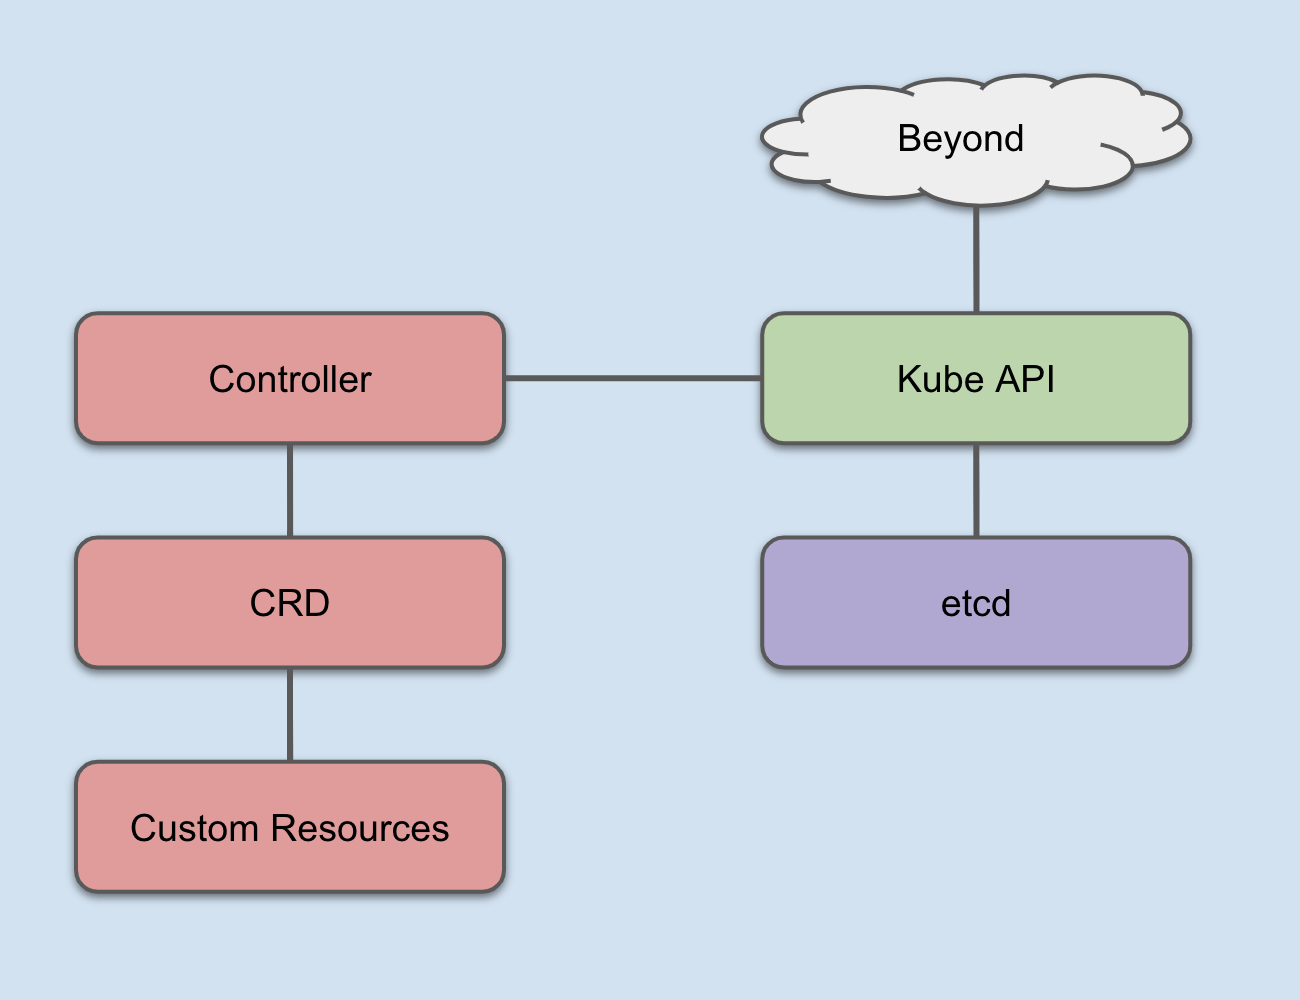
How Controllers and CRDs integrate into Kubernetes
Between custom Controllers and CRDS, you can arbitrarily extend the kubernetes database to handle all sorts of data related to various aspects of your application and application platform lifecycles. Operators make this a capability for just about any IT professional or team, instead of just the elite.
With that background in hand, let’s make some decisions and get started.
Building Operators uses a Software Development Kit (SDK). Since I’m on a Mac (long story), I can easily install it using brew.
$ brew install operator-sdk
There are several types of operators to use out of the box with the SDK.

Armed with this information, let’s pick a solution and start coding.
For this project, the Ansible Operator has the lowest barrier to entry (I’m not a Golang nor a Helm expert), and the workflows we envision integrate easily into Ansible playbooks and roles.
Decision made. Let’s get started!
When you install the Operator SDK, it adds a binary named operator-sdk on your system. To create a new Operator, you’ll need the following options set:
name: after the new parameter, you specify the name for your Operator
api-version (API Group): The API group is specified in a REST path and in the apiVersion field of a serialized object (quoted from the link)
kind: Kind is a string value representing the REST resource this object represents. Servers may infer this from the endpoint the client submits requests to. Cannot be updated. In CamelCase. (source)
type: the type of Operator you want to build. In our case, we’re using the Ansible Operator.
cluster-scoped: This Operator will be creating new projects (the OpenShift analog to a kubernetes namespace) and resources within those projects. That means we’ll need it to have access to the entire cluster, not just a single namespace.
$ operator-sdk new workshop-operator
–api-version=workshops.operator.redhatgov.io/v1
–kind=Workshop
–type=ansible
–cluster-scoped
you’ll see a bunch of output.
INFO[0000] Creating new Ansible operator 'workshop-operator'.
INFO[0000] Created deploy/service_account.yaml
INFO[0000] Created deploy/role.yaml
INFO[0000] Created deploy/role_binding.yaml
INFO[0000] Created deploy/crds/workshops_v1_workshop_crd.yaml
INFO[0000] Created deploy/crds/workshops_v1_workshop_cr.yaml
INFO[0000] Created build/Dockerfile
INFO[0000] Created roles/workshop/README.md
INFO[0000] Created roles/workshop/meta/main.yml
INFO[0000] Created roles/workshop/files/.placeholder
INFO[0000] Created roles/workshop/templates/.placeholder
INFO[0000] Created roles/workshop/vars/main.yml
INFO[0000] Created molecule/test-local/playbook.yml
INFO[0000] Created roles/workshop/defaults/main.yml
INFO[0000] Created roles/workshop/tasks/main.yml
INFO[0000] Created molecule/default/molecule.yml
INFO[0000] Created build/test-framework/Dockerfile
INFO[0000] Created molecule/test-cluster/molecule.yml
INFO[0000] Created molecule/default/prepare.yml
INFO[0000] Created molecule/default/playbook.yml
INFO[0000] Created build/test-framework/ansible-test.sh
INFO[0000] Created molecule/default/asserts.yml
INFO[0000] Created molecule/test-cluster/playbook.yml
INFO[0000] Created roles/workshop/handlers/main.yml
INFO[0000] Created watches.yaml
INFO[0000] Created deploy/operator.yaml
INFO[0000] Created .travis.yml
INFO[0000] Created molecule/test-local/molecule.yml
INFO[0000] Created molecule/test-local/prepare.yml
INFO[0000] Run git init ...
Initialized empty Git repository in /Users/jduncan/Code/workshop-operator2/workshop-operator/.git/
INFO[0000] Run git init done
INFO[0000] Project creation complete.
Change into the newly created directory and you’ll see a few files:
$ tree
.
├── build
│   ├── Dockerfile
│   └── test-framework
│       ├── Dockerfile
│       └── ansible-test.sh
├── deploy
│   ├── crds
│   │   ├── workshops_v1_workshop_cr.yaml
│   │   └── workshops_v1_workshop_crd.yaml
│   ├── operator.yaml
│   ├── role.yaml
│   ├── role_binding.yaml
│   └── service_account.yaml
├── molecule
│   ├── default
│   │   ├── asserts.yml
│   │   ├── molecule.yml
│   │   ├── playbook.yml
│   │   └── prepare.yml
│   ├── test-cluster
│   │   ├── molecule.yml
│   │   └── playbook.yml
│   └── test-local
│       ├── molecule.yml
│       ├── playbook.yml
│       └── prepare.yml
├── roles
│   └── workshop
│       ├── README.md
│       ├── defaults
│       │   └── main.yml
│       ├── files
│       ├── handlers
│       │   └── main.yml
│       ├── meta
│       │   └── main.yml
│       ├── tasks
│       │   └── main.yml
│       ├── templates
│       └── vars
│           └── main.yml
└── watches.yaml

17 directories, 25 files
This is your Operator’s base model. Right now it doesn’t do much, but your bases are all there. Looking at the directory structure in a little more detail:
build — this directory holds a Dockerfile and some tests that are run when you trigger a build through the SDK.
deploy — the objects that are deployed after a build has been completed. We’ll work with these later in this post.
molecule — molecule is a test framework for Ansible roles. This is out of scope for this post, mainly because I haven’t gotten that far yet.
roles — The SDK created an empty Ansible role for you when it created your work environment.
watches.yaml — This file tells the SDK which roles and playbooks to insert into your CRD container when you build it. Essentially, this is where you tell the Operator SDK about Ansible you want to run as your Operator.
The content of watches.yaml at the beginning is essentially the information you supplied operator-sdk when you created the environment.
$ cat watches.yaml
---
- version: v1
  group: workshops.operator.redhatgov.io
  kind: Workshop
  role: /opt/ansible/roles/workshop
This is used by the SDK to ensure the right Ansible content is associated with the right version of the kubernetes objects that are created to make your Operator. With this in order, the right kubernetes events will be associated with the corresponding Ansible content.
You could technically build your Operator right now. It wouldn’t do anything, but it would build. Next, let’s make it do something.
Our first task will be to have our Operator create a namespace to hold any shared resources for our workshop. This will give us a simple role, and something that we can confirm is happening when we deploy the Operator.
Add the following task to roles/workshop/tasks/main.yml. The meta.name variable is set inside the container at runtime by the code that configures ansible-runner inside the container.
---

- name: Create project for global workshop content
  k8s:
    api_version: v1
    kind: Namespace
    name: "{{ meta.name }}"
With that initial task added to our role, let’s build our operator for the first time to see how the process works.
When the Ansible Operator is built, the playbooks and/or roles referenced in watches.yaml are incorporated using a specialized base image that containers ansible-runner. From the outside, the process looks very similar to source-to-image. The process is governed by build/Dockerfile.
$ cat build/Dockerfile
FROM quay.io/operator-framework/ansible-operator:v0.6.0

COPY roles/ ${HOME}/roles/
COPY watches.yaml ${HOME}/watches.yaml
To build the workshop Operator, use the operator-sdk command.
$ operator-sdk build quay.io/jduncan/workshop-operator:v1
Step 1/3 : FROM quay.io/operator-framework/ansible-operator:v0.6.0
...
Step 2/3 : COPY roles/ ${HOME}/roles/
 ---> 1a0094e3c710
Step 3/3 : COPY watches.yaml ${HOME}/watches.yaml
 ---> 44a4573f0e00
Successfully built 44a4573f0e00
Successfully tagged quay.io/jduncan/workshop-operator:v1
You should be able to see your new container image in your local container image cache.
$ docker images
REPOSITORY                                                       TAG                 IMAGE ID            CREATED              SIZE
quay.io/jduncan/workshop-operator                                v1                  0fd27b9c9905        6 seconds ago       611MB
Finally, push your newly created image to your container registry. In the example, we’re using quay.io.
$ docker push quay.io/jduncan/workshop-operator
The push refers to repository [quay.io/jduncan/workshop-operator]
...
v1: digest: sha256:97180d40822007bc81628bdd459077bd6c9301f516c5354f178260e2fbe173d0 size: 19642
And that’s it for the build process. The image for your new Operator has been created. Next, we need to tweak a file or two so we can actually deploy the Operator to an OpenShift cluster.
When we created our new Operator, it created deploy/operator.yaml. We need to change a few default values to specify the uploaded image and a restart policy.
This is covered in the docs, but it does look to be a bit out of date. Because I’m doing this on MacOS, I’ll run a few quick sed statements to take care of it all. Note that opererator.yaml is creating a kubernetes Deployment object.
$ sed -i "" 's|{{ REPLACE_IMAGE }}|quay.io/jduncan/workshop-operator:v1|g' deploy/operator.yaml

$ sed -i "s|REPLACE_NAMESPACE|workshop-operator|g" deploy/role_binding.yaml

$ sed -i "" 's|{{ pull_policy\|default('\''Always'\'') }}|Always|g' deploy/operator.yaml
After those changes have been made, it’s time to deploy the initial version of our Operator. This is done by running several of the yaml files inside deploy/. Because we’re deploying this into an OpenShift cluster, we’re using the oc command.
First, create a project to house our new Operator
$ oc new-project workshop-operator Now using project “workshop-operator” on server “https://api.test.kuberati.com:6443”.
You can add applications to this project with the ’new-app’ command. For example, try:
oc new-app centos/ruby-25-centos7~https://github.com/sclorg/ruby-ex.git
to build a new example application in Ruby.
Then, create a service account for the Operator to use
$ oc create -f deploy/service_account.yaml serviceaccount/workshop-operator created
Next, create a role for the Operator. We need to make a few edits to the version of deploy/role.yaml that was generated when we created our Operator. Because we’re using the serviceaccount to create resources outside of its default namespace, we need to give it more power. The config here is not production-ready. But we’re not in production, we’re creating a prototype! It should look like the example below.
apiVersion: rbac.authorization.k8s.io/v1 kind: ClusterRole metadata: creationTimestamp: null name: workshop-operator rules:
With that done, we create our role.
$ oc create -f deploy/role.yaml role.rbac.authorization.k8s.io/workshop-operator created
Next, bind the role to the service account
$ oc create -f deploy/role_binding.yaml clusterrolebinding.rbac.authorization.k8s.io/workshop-operator created
Next, deploy the CRD that will be used by the Operator.
$ oc create -f deploy/crds/workshops_v1_workshop_crd.yaml customresourcedefinition.apiextensions.k8s.io/workshops.workshops.operator.redhatgov.io created
Finally, deploy the Operator itself, which references the role binding above.
$ oc create -f deploy/operator.yaml deployment.apps/workshop-operator created
With these steps complete, we have an Operator deployed! To confirm, check to make sure the deployment is up and running.
Note: We’ve broken this out into individual steps to better explain it. But we’ve also put this all into a handful of convenient scripts in this project’s Github repo.
$ oc get deployment
NAME                READY   UP-TO-DATE   AVAILABLE   AGE
workshop-operator   1/1     1            1           6m14s
If you run oc get workshops, no resources will be returned (we haven’t deployed a workshop yet, just the Operator to control them). But it doesn’t error out.
$ oc get workshops
No resources found.
To get down to the fun stuff, we have a file, deploy/workshops_v1_workshop_cr.yaml, that gives us a template to deploy a workshop. Because we haven’t changed the Ansible code to create unique namespace names yet, change the size parameter to 1 for this template.
$ cat deploy/crds/workshops_v1_workshop_cr.yaml
apiVersion: workshops.operator.redhatgov.io/v1
kind: Workshop
metadata:
  name: example-workshop
spec:
  # Add fields here
  size: 1
With that change made, let’s deploy a workshop! After it deploys, we’ll run oc get workshops again to confirm it was successful. Then to make sure the Ansible was executed properly, we’ll look for a newly created project named workshop-operator.
$ oc create -f deploy/crds/workshops_v1_workshop_cr.yaml
workshop.workshops.operator.redhatgov.io/example-workshop created

$ oc get workshops
NAME               AGE
example-workshop   15s

$ oc get projects | grep workshop
example-workshop                                         Active
workshop-operator                                        Active
Success! We deployed a Workshop resource, and the creation of that resource created a new project just like we told it to do using Ansible. With this work done, the only part that has to be repeated is creating the new custom resources. For example, if I change the name in workshops_v1_workshop_cr.yaml to something else, I can re-run it and get a new workshop with a new associated project. In this example, I copied deploy/crds/workshops_v1_workshop_cr.yaml to another file and changed the name to another-workshop.
$ oc create -f deploy/crds/workshops_v1_workshop2_cr.yaml
workshop.workshops.operator.redhatgov.io/another-workshop created

$ oc get workshops
NAME               AGE
another-workshop   62s
example-workshop   26m

$ oc get projects | grep workshop
another-workshop                                         Active
example-workshop                                         Active
workshop-operator                                        Active
We’ve now created our first functional Operator. It creates an resource called a Workshop, and each workshop resource in turns has a project created that will eventually house all of its shared content.
In the next section, we’ll create some additional work for our Operator to handle so we can complete the success criteria we outlined at the beginning.
By default, the Ansible Operator watches for specific roles. But it’s an Ansible best practice to use multiple smaller roles and pull them together into a single playbook. To do this, we have to:
Create a playbook referencing our role(s)
Instruct watches.yaml to look for those playbooks instead of the default Ansible role.
Add the playbooks directory to build/Dockerfile.
To create the playbook, create a playbooks directory in the top level of your Operator directory. Inside that directory, create a file named workshop.yml with the following content.
---

- hosts: localhost
  roles:
    - workshop
The playbook will look in the roles directory for the workshop role we’ve already created. Next, edit watches.yaml to reference the playbook instead of the role. For both roles and playbooks, the parent directory /opt/ansible is the location inside the Operator container image that you build with the SDK. Be sure to use that path and not the path on your development system.
$ cat watches.yaml
---
- version: v1
  group: workshops.operator.redhatgov.io
  kind: Workshop
  playbook: /opt/ansible/playbooks/workshop.yml
The final task to make sure build/Dockerfile will include the playbooks directory when it builds our Operator image. Edit your file to look like the example below.
$ cat build/Dockerfile
FROM quay.io/operator-framework/ansible-operator:v0.6.0

COPY roles/ ${HOME}/roles/
COPY playbooks/ ${HOME}/playbooks/
COPY watches.yaml ${HOME}/watches.yaml
And that’s it. The workshop Operator now watches the workshop playbook we just created. Next, we’ll add a student object to our Operator.
When we defined our success criteria at the beginning, we stated that we wanted to create workshops (done) and students. Let’s add a student object to our Operator now. We can accomplish this using the operator-sdk tool. We need to supply it an API value including a version and a Kind value.
$ operator-sdk add crd \
--api-version students.operator.redhatgov.io/v1 \
--kind Student
INFO[0000] Generating Custom Resource Definition (CRD) version student.operator.redhatgov.io/v1 for kind Student.
INFO[0000] Created deploy/crds/student_v1_student_crd.yaml
INFO[0000] Created deploy/crds/student_v1_student_cr.yaml
This process creates the CRD and CR files for our new object. We’ll use those when we deploy our new objects into the operator. Next, let’s add Ansible code to our Operator to create our Student objects.
We want our student objects to mirror our workshop objects as closely as practical. We’ll start by creating a new student Ansible role using ansible-galaxy.
$ cd roles/
$ ansible-galaxy init student
- student was created successfully

$ tree student
students
├── README.md
├── defaults
│   └── main.yml
├── files
├── handlers
│   └── main.yml
├── meta
│   └── main.yml
├── tasks
│   └── main.yml
├── templates
├── tests
│   ├── inventory
│   └── test.yml
└── vars
    └── main.yml
Add the following content to roles/students/tasks/main.yml.
- name: Create project for student
  k8s:
    api_version: v1
    kind: Namespace
    name: "{{ meta.name }}"
Next, create playbooks/student.yml with the following content.
---
- hosts: localhost
  roles:
    - student
With our new student role and playbook created, we need to tell watches.yaml to watch our new student content.
$ cat watches.yaml
---
- version: v1
  group: workshops.operator.redhatgov.io
  kind: Workshop
  playbook: /opt/ansible/playbooks/workshop.yml

- version: v1
  group: operator.redhatgov.io
  kind: Student
  playbook: /opt/ansible/playbooks/student.yml
With this work done, we can build a new version of our Operator container image! Be sure to increment the version number so we can keep that from being confusing.
$ operator-sdk build quay.io/jduncan/workshop-operator:v1
INFO[0000] Building Docker image quay.io/jduncan/workshop-operator:v2
Sending build context to Docker daemon  189.4kB
Step 1/3 : FROM quay.io/operator-framework/ansible-operator:v0.5.0
 ---> 1e857f3522b5
Step 2/3 : COPY roles/ ${HOME}/roles/
 ---> 2d415bae1bf4
Step 3/3 : COPY watches.yaml ${HOME}/watches.yaml
 ---> 0a45095442ba
Successfully built 0a45095442ba
Successfully tagged quay.io/jduncan/workshop-operator:v2
INFO[0001] Operator build complete.
After the build completes, push the container image to the repository.
$ docker push quay.io/jduncan/workshop-operator:v1
...
v2: digest: sha256:96e40f62a49b96e7a068a3858afc4f65ab11d71cfeeac1fd825f1a32dba73b1f size: 19172
To deploy our new Operator, we delete the previous deployment and create our new one. Also, be sure to create the new student CRD.
$ oc delete deployment workshop-operator
deployment.extensions "workshop-operator" deleted

$ oc create -f deploy/operator.yaml
deployment.apps/workshop-operator created

$ oc create -f deploy/crds/student_v1_student_crd.yaml
customresourcedefinition.apiextensions.k8s.io/students.student.operator.redhatgov.io created
To test our new Operator out, edit deploy/crds/student_v1_student_cr.yaml to look like the example.
$ cat deploy/crds/student_v1_student_cr.yaml
apiVersion: student.operator.redhatgov.io/v1
kind: Student
metadata:
  name: example-student
spec:
  # Add fields here
  size: 1
Deploy a test student.
$ oc get students
No resources found.

$ oc create -f deploy/crds/student_v1_student_cr.yaml
student.student.operator.redhatgov.io/example-student created

$ oc get students
NAME              AGE
example-student   5s

$ oc get projects | grep student
example-student                          Active
We now have our custom resources for workshops and students being created and managed by our workshop Operator. But it’s a little hard-coded and brittle. You don’t want to have to write yaml for each student in a workshop when you have 50 students. For our last section, we’re going to tie our workshop and student objects together more tightly and have them do some more effective work.
Now that we have the fundamentals of our workshop Operator going, let’s get a little more practical. First, let’s tackle the task of having the workshops themselves deploy their own student objects.
First, edit roles/workshop/tasks/main.yml to contain the following code. This new task will take a variable, num_students, and creates the corresponding number of student objects.
---

- name: Create project for global workshop content
  k8s:
    api_version: v1
    kind: Namespace
    name: "{{ meta.name }}"

- name: Create students for workshop
  k8s:
    definition: "{{ lookup('template', 'student.yaml.j2') | from_yaml }}"
  vars:
    student_number: "{{ item }}"
  loop: "{{ range(1, num_students + 1) | list }}"
  when: num_students is defined
The new task uses an Ansible template and uses that rendered information to create the new kubernetes objects. The template is located at roles/workshop/templates/student.yaml.j2, and looks like the example below. The meta.name is the same value we used in the workshop role. The name is dynamic formatting to pick up a name for each project that’s unique for each student.
apiVersion: students.operator.redhatgov.io/v1
kind: Student
metadata:
  name: "{{ 'student%02d' | format(student_number) }}"
  namespace: "{{ meta.name }}"
spec:
  workshopName: "{{ meta.name }}"
With these files in place, rebuild the container image and upload it.
$ operator-sdk build quay.io/jduncan/workshop-operator:v1
INFO[0000] Building Docker image quay.io/jduncan/workshop-operator:v1
Sending build context to Docker daemon  190.5kB
Step 1/4 : FROM quay.io/operator-framework/ansible-operator:v0.6.0
 ---> 5c51606d3f0e
Step 2/4 : COPY roles/ ${HOME}/roles/
 ---> 54b5a0bef4a7
Step 3/4 : COPY playbooks/ ${HOME}/playbooks/
 ---> 445da9f5faaa
Step 4/4 : COPY watches.yaml ${HOME}/watches.yaml
 ---> 481899806b43
Successfully built 481899806b43
Successfully tagged quay.io/jduncan/workshop-operator:v1
INFO[0002] Operator build complete.

$ docker push quay.io/jduncan/workshop-operator:v1
The push refers to repository [quay.io/jduncan/workshop-operator]
c080bf655ca4: Pushed
0741b9b522c4: Pushed
a28abf610d57: Pushed
...
v1: digest: sha256:3ac111f13b305408f742b42e7d2f0c8d5125250a77762ab8ba1633cfe52a4f3a size: 20158
Before we re-deploy, let’s clean up the previous workshops and students to make sure the new configuration automatically deploys students for us.
$ oc delete deployment workshop-operator
deployment.extensions "workshop-operator" deleted

$ oc delete workshop example-workshop
workshop.workshops.operator.redhatgov.io "example-workshop" deleted

$ oc delete workshop another-workshop
workshop.workshops.operator.redhatgov.io "another-workshop" deleted

$ oc delete student example-student
student.students.operator.redhatgov.io "example-student" deleted
With those objects cleaned up, re-deploy the workshop Operator with the new image that contains the new Ansible code.
$ oc create -f deploy/operator.yaml
deployment.apps/workshop-operator created

$ oc get pods
NAME                                 READY   STATUS    RESTARTS   AGE
workshop-operator-6759b6cf87-cc9xf   2/2     Running   0          54s
After the new Operator is running, deploy a workshop.
$ oc create -f deploy/crds/workshops_v1_workshop_cr.yaml
workshop.workshops.operator.redhatgov.io/example-workshop created
We’re deploying the same custom resource, but because we’ve updated the Operator, the Student resources also get deployed, along with their projects.
$ oc get projects | grep student
example-workshop-student01                               Active
example-workshop-student02                               Active
example-workshop-student03                               Active
When a Workshop resource is created, it creates numStudents number of corresponding Student resources. The creation of those resources trigger the corresponding Ansible playbook to be run from watches.yaml.
That’s what we decided to have our Operator do for this project. It doesn’t take a huge leap to see thousands of potential use cases for the Ansible Operator in your OpenShift or kubernetes cluster.
It took several people several days and thousands of Google searches for documentation to begin to make this project. As with most articles, our hope is that taking the time to read this will save you some of that time and some of that research.
Operators bring a lot of power into the software-defined world of a kubernetes cluster. This is an example of one use case where we’re able to move a relatively manual process into a fully automated process wholly contained in our OpenShift cluster. The goal of an Operator is to move operational tasks for your applications into the cluster itself.
The example we’ve used in this post is an actively developed project. Our goal is to push a lot of our Red Hat workshop content into this delivery format. We’re keeping all of this work on Github.
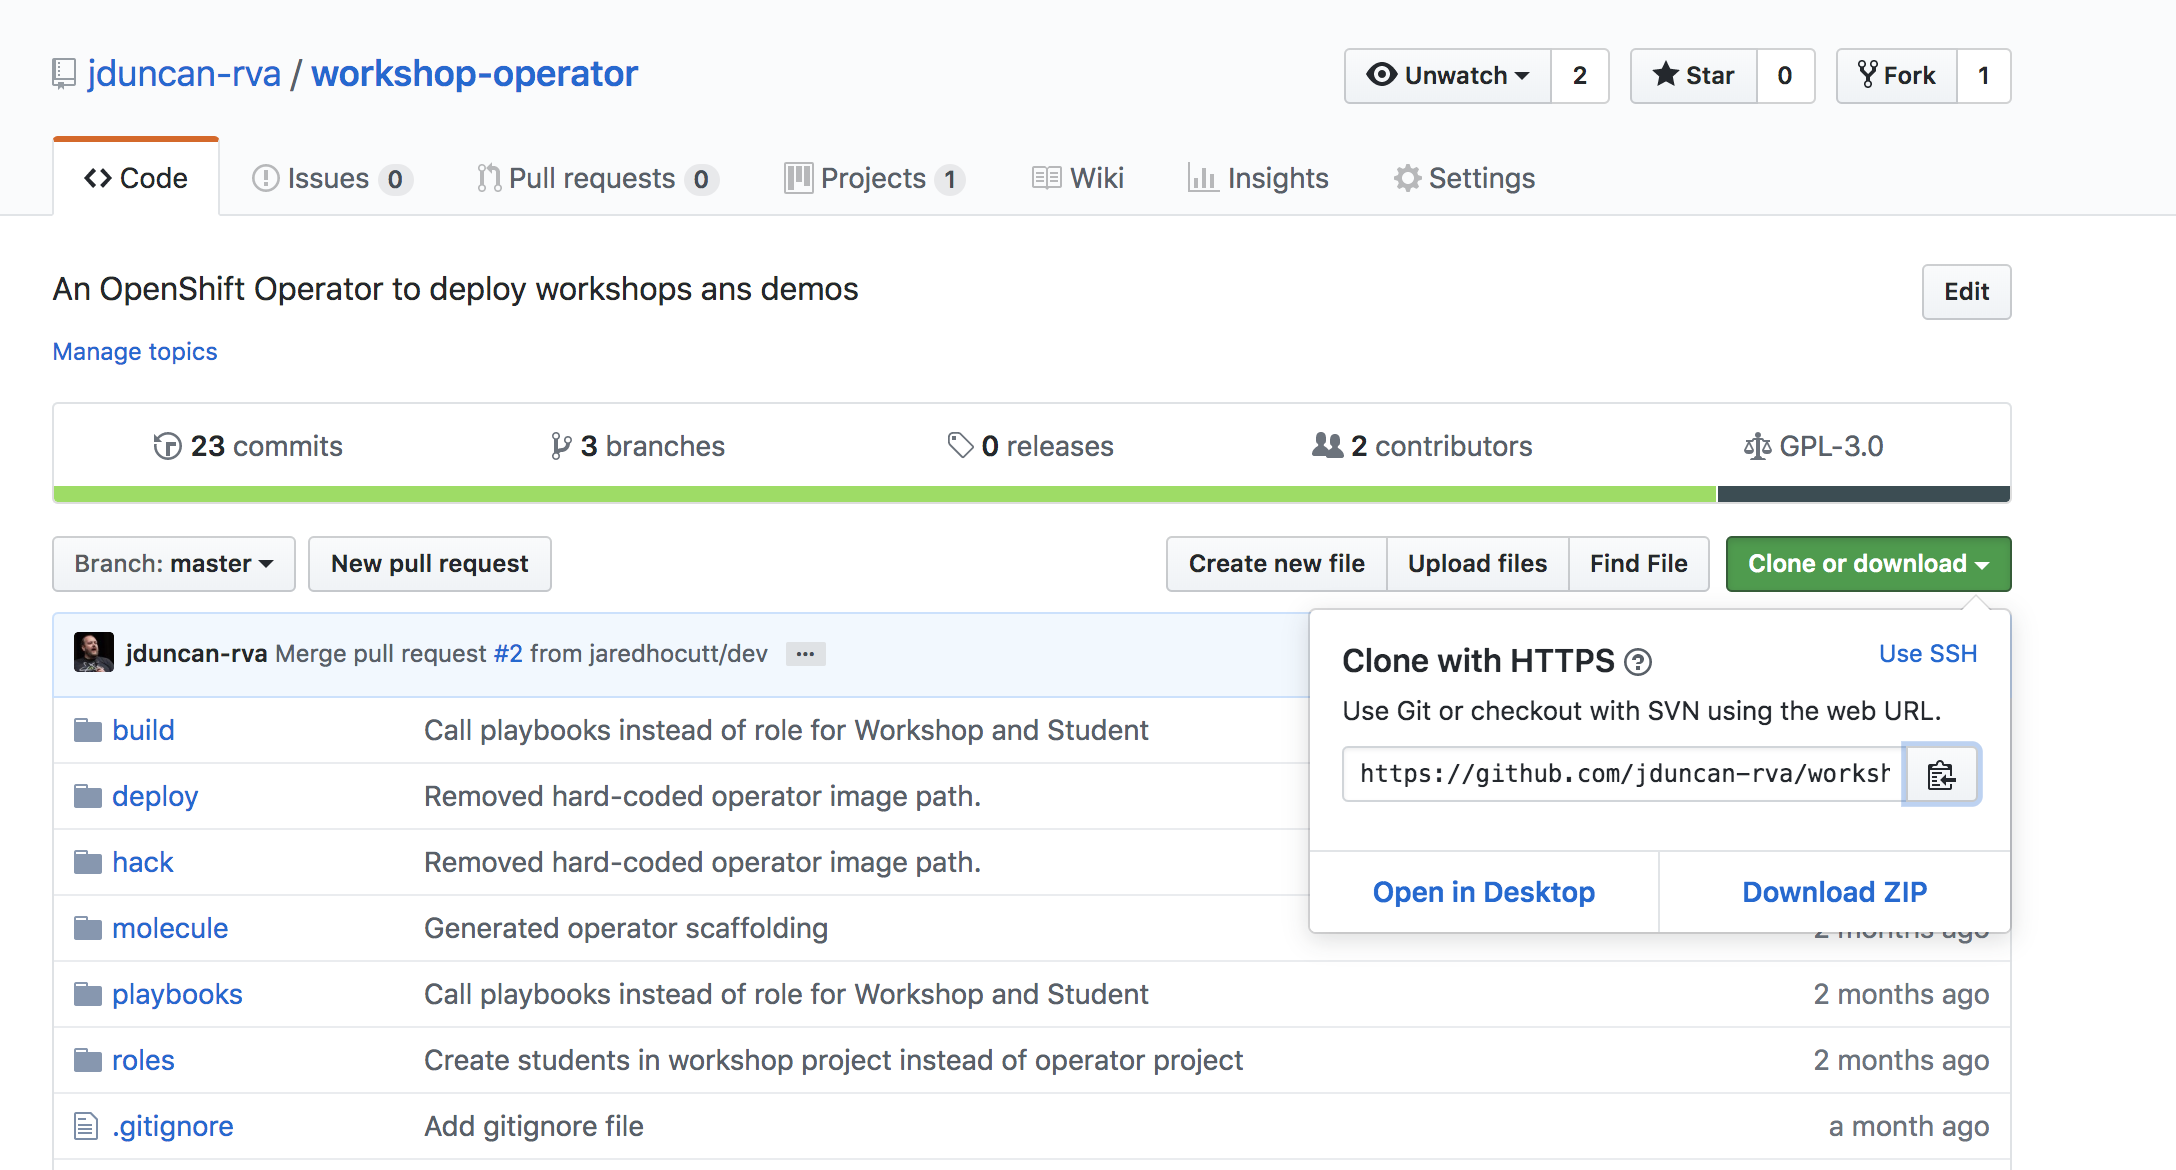
Workshop Operator code on Github
Next steps include automating the creation of lab guide content using Sphinx (a topic for an upcoming blog post), as well as continuing to build out resources for our projects to continue the automation process.
Comments and issues/PRs/stars are always welcome!